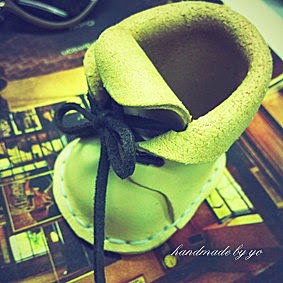
2012/8/20

皮製鎖匙包


終於都完成了這個工序複雜-鎖匙包


用左2種唔同既皮革去整
真係層層疊........
無d心都唔得!


多謝vi 割愛- 豹紋皮


將正中間的部分改縫上三分一的皮,匙就可以固定,真係一個唔錯既選擇!^^

左手邊的有個放卡位!實用左!!!

雖然過程好複雜,但用上唔同皮,效果

辛苦!


2012/8/13

脹卜卜-鞋仔


完成了


好細隻既鞋仔
超得意

做呢隻鞋仔,都學左好多方法!

同埋都可以玩局部染色
但我無玩到,想清清地簡約就ok la


好鐘意隻鞋頭脹卜卜呀!!!


2012/8/10

簡約 .Necklace

以下圖及文字轉載 lisa 網絡分享

Lets get started with materials:


Materials:

1. Polymer clay
2. Blade
3. Hole poking tool (I don't know what the fancy name for that is!)
4. Natural twine
5. Glass
6. Card
7. Baking tray
8. Jewellery findings
9. Gold leaf (I found mine at the hardware store)

The steps are super easy:


Step 1: Condition your clay by rolling it in the palm of your hand for a couple of minutes until it is soft and pliable.

The great thing about polymer is you can mix colours. I made this pretty apricot colour with a bright orange and some white. Luckily the other pastel colours were in stock at the shop.


Step 2: Use the glass to roll out the clay, making sure it is even. If you don't use an even sided glass you won't be able to get the clay an even thickness.

If you have an acrylic rolling pin that will be even easier to use!


Step 3: Use your blade to cut a triangle shape. You could get fancy and do a hexagon but I was a bit too mathematically challenged for that on a Friday afternoon!


Step 4: Use something to poke a hole in the top for your cord. I actually have a special polymer hole puncher, but you could use a knitting needle or something similiar.


Step 5: Place you triangle face down on a piece of gold leaf, making sure it has a straight edge at the top.


Step 6: Turn it over and use the gold leaf backing to rub the leaf on to the polymer. Rub it pretty hard to get it nice and smooth.

You can then tear away the excess gold leaf to leave a lovely triangle of gold like below.


Step 7: After you have finished making all of your pieces if you are making more than one necklace, put all of the pieces onto a card and place on a baking tray reading for baking.

Follow your clay's instructions to bake. I had to bake mine at 130 deg Celsius for 15 minutes. It is a good idea to cover the tray in aluminum foil to ensure no fumes escape into the stove. The clay packet says it is fine for a domestic oven, but I like to be safe.


Step 8: Once your pieces are cooked and cooled, thread the cord through, tie a knot and then attach your findings to the top, making sure you have the desired length.


     呢個方法好簡單,材料亦是好普遍的,只要材料換一換,例如:羊毛,冷線,皮革...又是另一型格設計!^^

Bling Bling 鞋-diy

以下圖及文字轉載 lisa 網絡分享


What you will need:
a pair of sneakers - we each found what we loved!
fabric glue - tacky glue seemed to work the best
glitter - duh!
painters tape
paper plates
a shoe box
craft sticks or toothpicks
other metallic embellishments

First up, gather your shoes and supplies:


Take out your shoe laces. Pull out the tongue, don't stick it out....pull it out silly! And tape down the rest of the shoe with painters tape.


Apply your tacky glue with a craft sponge...or your finger. I'm a "get messy kinda girl" so I prefer the finger method myself! Liberally shake glitter onto the glued area...OVER A SHOE BOX!


Shake off excess glitter into your box, then pour it onto a paper plate to re-use for the next "gluing". (see we are even recycling when we glitter!) Switch shoes in order to allow the section you just worked on to dry for a few minutes.


Now start in on another section...using either a toothpick or craft stick to get around tough areas. You will be able to easily scrape the dried glitter off the grommets later, so don't worry too much! (see our lovely examples of the "glue experience"). Then repeat the glittery steps.


**Note** I chose silver and black glitter over grey shoes = easy. Tahlia chose pink glitter over pink shoes = SUPER easy. Anneke chose black glitter over white shoes = much more labor intensive, but oh-so-cool!


We did allow them dry for an entire day before we attempted to lace them up and wear them out! Last step I sprayed them with an art fixative "just in case".